Getting Started: Installation & General Settings
Welcome to RS ARC Manager! This guide will walk you through installing the plugin and configuring the essential global settings to get your ARC team up and running in minutes.
Step 1: Install and Activate the Plugin
First, let’s get the plugin onto your WordPress site.
- Log in to your WordPress Admin Dashboard.
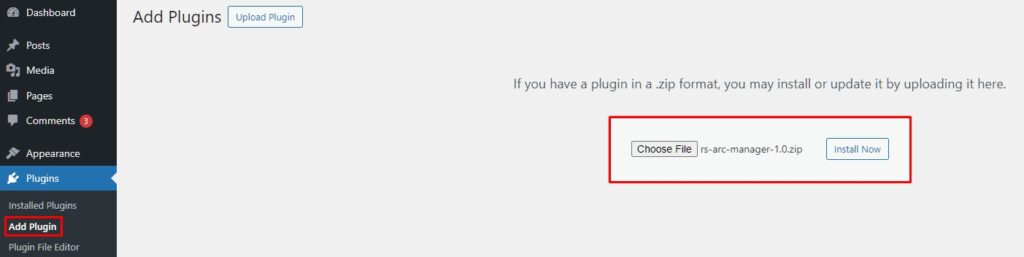
- Navigate to Plugins > Add New.
- Click the Upload Plugin button at the top of the page.
- Click Choose File and select the
rs-arc-manager.zipfile you downloaded after purchase. - Click Install Now.
- Once installed, click Activate Plugin.
Step 2: Create the Reviewer Dashboard Page
Before configuring the settings, you need to create a page where your reviewers will log in to download books and submit reviews.
- Go to Pages > Add New.
- Give the page a title (e.g., “Reviewer Dashboard” or “My ARC Library”).
- In the content area, simply paste the following shortcode:
[rs_arc_dashboard] - Click Publish.

Step 3: Configure General Settings
Now that the plugin is active and the dashboard page exists, let’s connect them.
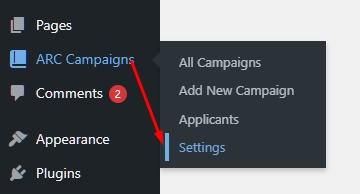
- In your WordPress Admin menu, look for ARC Campaigns.
- Click on Settings.
- You will land on the “General Settings” tab by default.
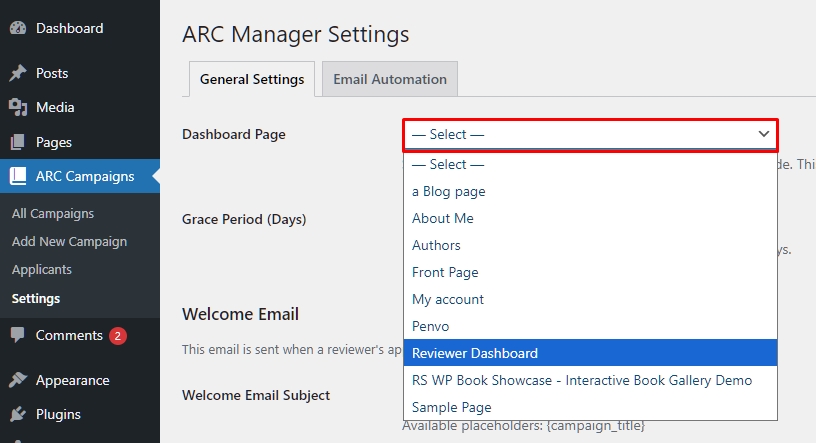
Step 4: Select Your Dashboard Page
This is a crucial step. The plugin needs to know which page acts as the “Home Base” for your reviewers.
- Dashboard Page: Click the dropdown menu and select the page you created in Step 2 (e.g., “Reviewer Dashboard”).
Why is this important?
The plugin uses this link in automated emails. When a reviewer clicks “Go to Dashboard” in their email, they will be directed to this specific page.
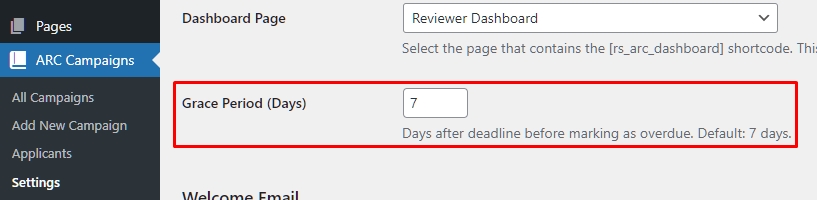
Step 5: Set the Grace Period
Not every reader finishes a book on time. The Grace Period setting allows you to handle late reviews automatically.
- Grace Period (Days): Enter the number of extra days you want to give reviewers after the official deadline. (Default is 7 days).
How it works:
- If the deadline is Dec 1st and Grace Period is 7 days:
- Dec 2nd – Dec 7th: The reviewer sees an “Overdue” warning but can still submit the review.
- Dec 8th onwards: The system marks them as “Restricted” or “Banned” (depending on your strictness settings), and they may be blocked from future campaigns.
Step 6: Configure Application Form Fields
You can decide what information you want to collect from applicants.
- Scroll down to the “Application Form Fields” section.
- Goodreads URL: This is always required by default.
- Social Media Toggles: Check the boxes for the platforms you care about (e.g., Facebook, Instagram, X/Twitter, TikTok).
- Uncheck any platforms you don’t use. These fields will appear dynamically on the application form.

Step 7: Save Changes
Once you are done, simply click the Save Changes button at the bottom of the page.
🎉 Congratulations! Your ARC system is now configured. You are ready to create your first book campaign.
Next Tutorial: [How to Create Your First ARC Campaign]