Reviewing & Approving Applicants
One of the best features of RS ARC Manager is that it doesn’t just collect names; it helps you vet your reviewers. Instead of accepting everyone blindly, you can check their profiles, social media presence, and past reputation before giving them your book.
This guide explains how to manage your applicant list effectively.
1. Accessing the Applicants Dashboard
When readers apply for your campaign, they don’t get the book immediately. They sit in a “Pending” queue until you approve them.
- Log in to your WordPress Admin.
- Navigate to ARC Campaigns > Applicants.
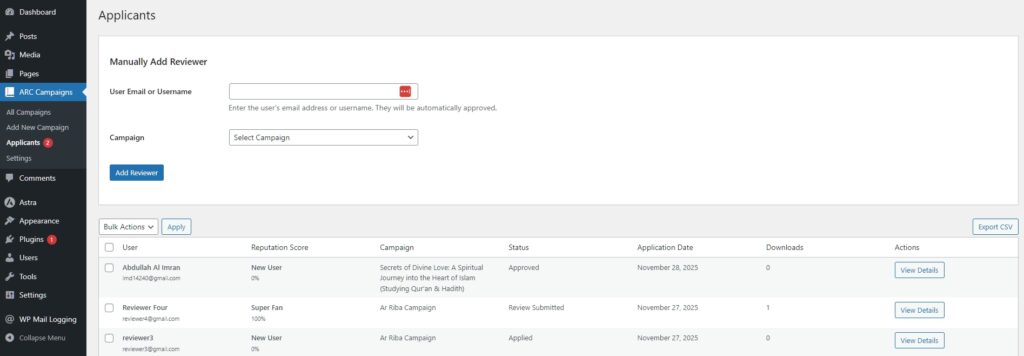
- Here you will see a list of everyone who has applied to your campaigns.
- Tip: You can filter this list by specific campaigns using the dropdown menu at the top if you are running multiple book launches at once.
2. Analyzing an Applicant (The “View Details” Modal)
Before approving someone, you want to know if they are a genuine reader.
- Locate an applicant in the list.
- Click the “View Details” button in the Actions column.
- A pop-up modal will open containing all their application data.
What to look for in the Modal:
- Goodreads Profile: Click the link to check if they actively review books in your genre.
- Social Profiles: If you enabled fields like Instagram or TikTok, their links will appear here. Check if they have an active following.
- Past History: You can see how many downloads they have triggered.

3. Checking the Reputation Score
In the main table, look at the “Reputation Score” column. This score is calculated automatically by the system based on their past performance.
- Super Fan (90-100%): Safe to approve instantly. They almost always review.
- Good/Reliable (50-89%): Generally safe.
- Bad User / New User (0-30%): Proceed with caution. Check their external profiles carefully before approving.
4. Approving or Rejecting
Once you have decided who fits your team, it’s time to take action.
- Select Users: Check the box next to the name of the applicant(s) you want to approve. You can select multiple people at once.
- Choose Action: Go to the “Bulk Actions” dropdown menu at the top of the table.
- Select “Approve” (to give access) or “Reject” (to block access).
- Click the “Apply” button.
What happens next?
- If Approved: The user’s status changes to “Approved,” and they instantly receive the “Welcome Email” containing the link to their dashboard.
- If Rejected: Their status changes to “Banned,” and they cannot access the book.

5. Manually Adding a Reviewer
Do you have a close friend or a top influencer who shouldn’t need to apply? You can add them directly.
- At the top of the Applicants page, look for the “Manually Add Reviewer” form.
- Enter their Email Address (must be a registered user on your site).
- Select the Campaign.
- Click “Add Reviewer”.
They will be added and automatically approved without needing to fill out the form.
Next Tutorial: [Understanding the ‘Reputation Score’]