Distributing Advance Review Copies (ARCs) is a crucial step in a successful book launch. But managing spreadsheets, sending manual follow-up emails, and tracking who actually left a review can quickly become a full-time job.
Enter RS ARC Manager. This powerful ecosystem is designed specifically for authors and publishers to securely distribute books, track reader reputation, and automate the entire review collection process.
Whether you are using the Free version to get started or the Pro version to fully automate your workflow, this step-by-step guide will show you exactly how to manage your ARC campaigns from start to finish.
Table of Contents
Phase 1: Preparing Your ARC Ecosystem (Complete Setup)
Before you invite readers to download your book, you need to set up the foundation. This ensures your reviewers have a seamless experience and your automated systems know exactly what to do.
Step 1: Set Up the Reviewer Dashboard (The Reader’s Portal)
Your reviewers need a dedicated portal on your website. This is where they will log in, view the books they have been approved to read, download the secure files, and submit their final review links.
How to set it up:
- In your WordPress dashboard, navigate to Pages > Add New.
- Give the page a title, such as “Reviewer Dashboard” or “My ARC Team”.
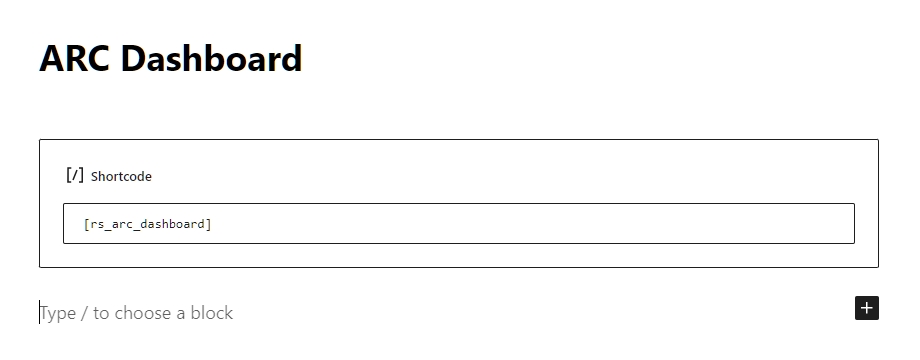
- In the page editor, add a Shortcode block and paste the following exact code:
[rs_arc_dashboard] - Click Publish to save the page.
Link the Dashboard to the Plugin:
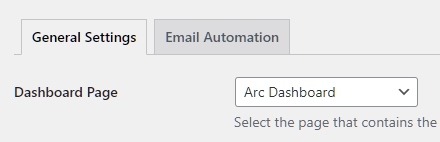
- Now, navigate to ARC Campaigns > Settings in your WordPress menu.
- Under the General Settings tab, look for the option labeled “Dashboard Page”.
- Click the dropdown menu and select the page you just created.
- Scroll to the bottom and click Save Changes.
Step 2: Define the “Grace Period”
Life happens, and sometimes readers miss their reading deadlines due to unforeseen circumstances. The “Grace Period” dictates how many extra days a reader has to submit their review after the official deadline has passed before they are penalized.
How to configure it:
- Go to ARC Campaigns > Settings > General Settings.
- Locate the “Grace Period (Days)” field.
- Enter your preferred number. The default is 7 days, which is industry standard. If a user fails to submit their review after this grace period expires, the system automatically locks their submission form and downgrades their global Reputation Score.

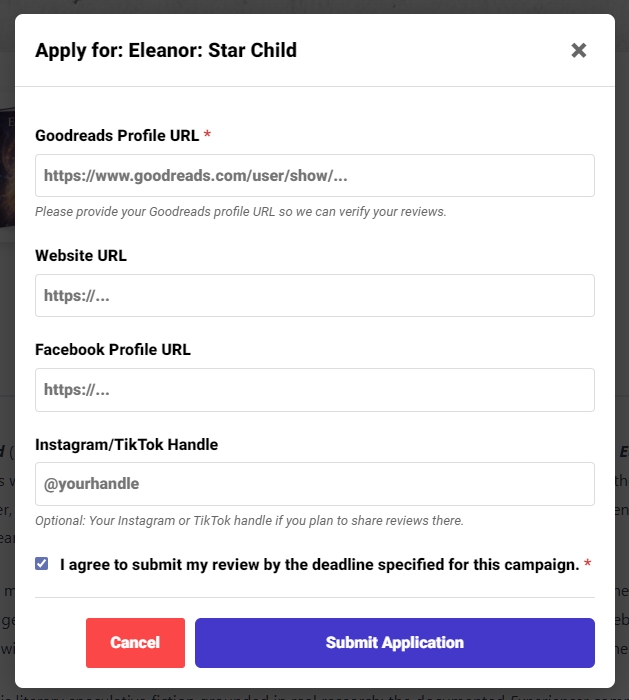
Step 3: Customize the Application Form (Pro Feature)
When readers apply for an ARC, the free version requires them to provide their primary Goodreads URL. However, if you are using RS ARC Manager Pro, you can gather much more marketing data by requiring additional social media profiles.
How to enable social fields:
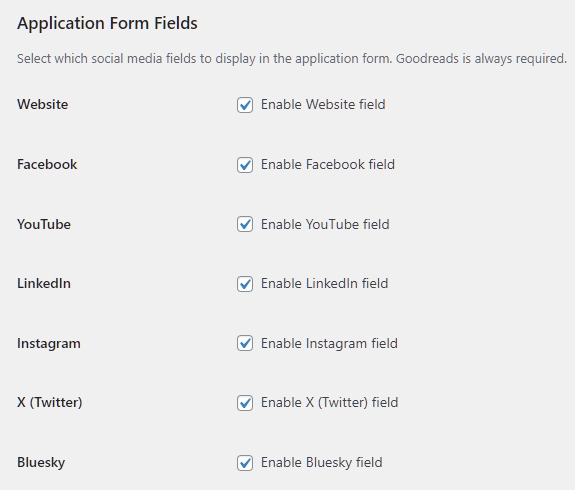
- Navigate to your ARC Settings and find the application form configuration options.
- You will see a list of checkboxes for various platforms: Website/Blog, Facebook, YouTube, LinkedIn, Instagram, X (Twitter), and Bluesky.
- Check the boxes for the platforms that matter most to your book launch. For example, if you want to recruit “Bookstagrammers” or “BookTokers”, make sure Instagram and YouTube/TikTok fields are enabled.
- Save your changes. These fields will now dynamically appear when a reader applies for your book.
Step 4: Configure Email Automation (Pro Feature)
One of the biggest headaches for authors is chasing down reviewers. With the Pro version, you can completely automate this using a 4-Stage Email sequence.
Understanding the 4 Stages:
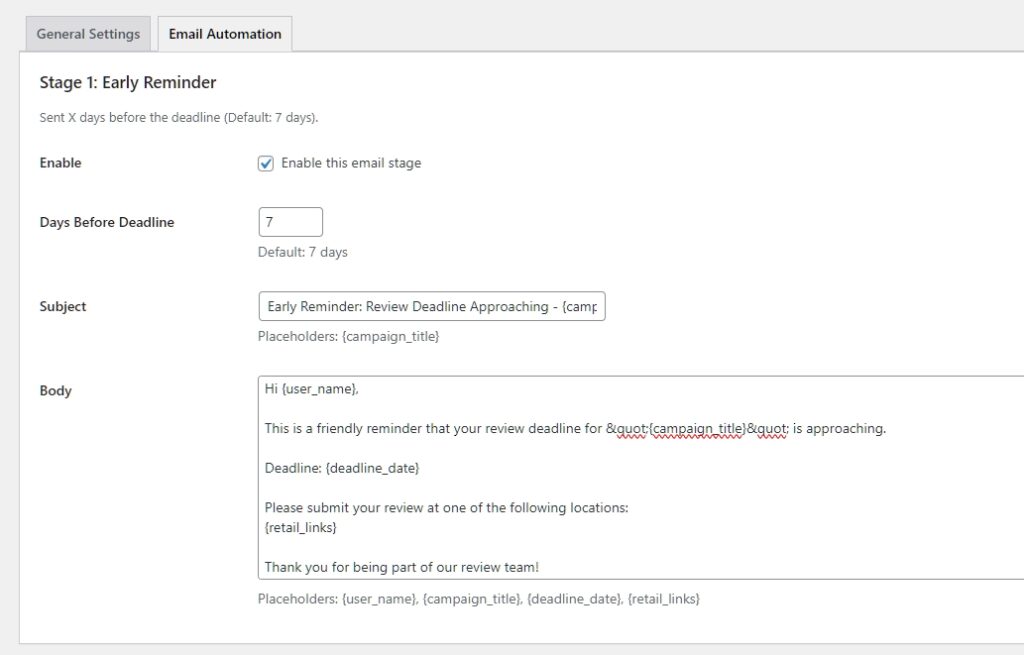
- Stage 1 (Early Reminder): Sent a few days before the deadline. A gentle nudge to start reading.
- Stage 2 (Urgent Reminder): Sent 1 day before the deadline.
- Stage 3 (Overdue Notice): Sent exactly when the deadline is missed, reminding them of the grace period.
- Stage 4 (Final Warning): Sent right before the Grace Period ends.
How to set up your emails:
- Go to ARC Campaigns > Settings and click on the Email Automation tab.
- Here, you can customize the subject lines and email body text for each of the 4 stages.
- Use Dynamic Placeholders: To make the emails personal, do not type the reviewer’s name manually. Instead, use the provided tags. Copy and paste these tags into your email body:
{user_name}– Automatically inserts the reviewer’s display name.{campaign_title}– Inserts your book’s title.{deadline_date}– Inserts the exact deadline date.{retail_links}– Inserts the clickable links to Amazon, Goodreads, etc., where they need to leave the review.{grace_end_date}– (Best for Stage 3 & 4) Inserts the final date before their account is restricted.
Example Email Body:
“Hi {user_name}, Just a quick reminder that your review for {campaign_title} is due on {deadline_date}. Please submit your review links here: {retail_links}.”
- Once your templates are written, click Save Changes. The plugin’s cron system will now automatically check dates and send these emails in the background while you focus on writing your next book!
Phase 2: Launching Your First ARC Campaign (Uploading Your Book)
Now that your global settings and Reviewer Dashboard are ready, it is time for the most exciting part: uploading your book and making it available for readers to apply!
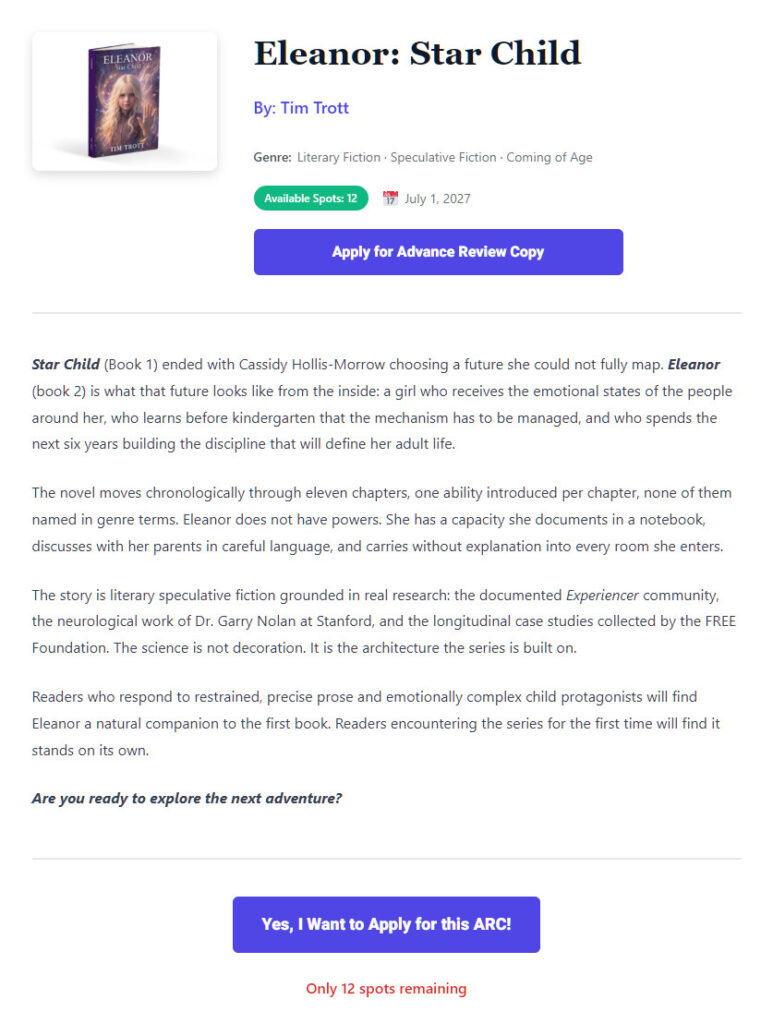
Step 1: Create the Campaign & Add Basic Details
Think of the campaign page as the sales page for your ARC. You want it to look professional and enticing.
How to set it up:
- In your WordPress dashboard, go to ARC Campaigns > Add New.
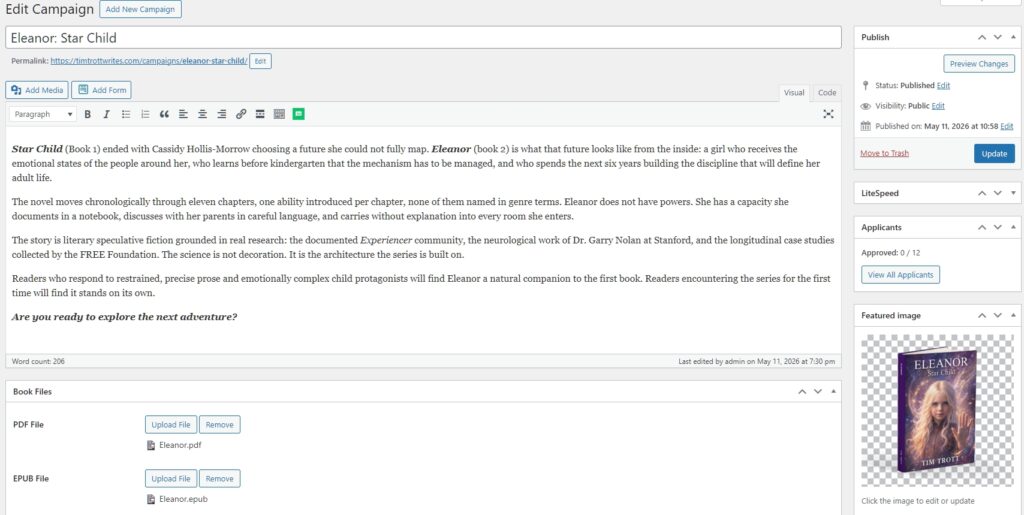
- Title: Enter your Book’s Title in the main title box at the top.
- Description: In the main text editor, paste your book’s blurb, synopsis, or a special note to your reviewers. Make it exciting!
- Book Cover: Look at the right sidebar, find the Featured Image section, and upload your high-resolution book cover. This cover will be displayed on the campaign grid and inside the reader’s dashboard.
Step 2: Upload Your Secure Book Files
RS ARC Manager takes piracy seriously. When you upload your manuscript files here, they are not accessible via standard WordPress media links. The system generates secure, token-based download links that expire and only work for users you specifically approve.
How to upload files:
- Scroll down below the main text editor until you see the “ARC Campaign Settings” panel.
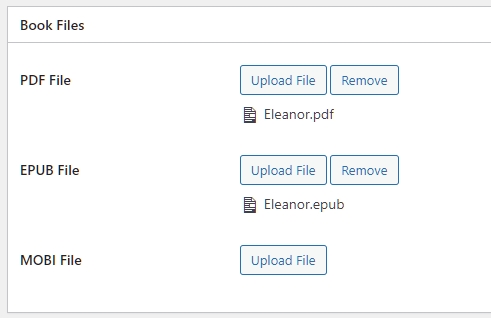
- Click on the “Book Files” tab.
- You will see upload buttons for PDF, EPUB, and MOBI. Click the “Upload” button next to each format you want to provide and select the file from your computer. (Providing at least EPUB and PDF is highly recommended to satisfy Kindle, Apple Books, and PC readers).
Step 3: Configure Campaign Parameters
This is where you define the rules for this specific book launch.
How to configure the rules:
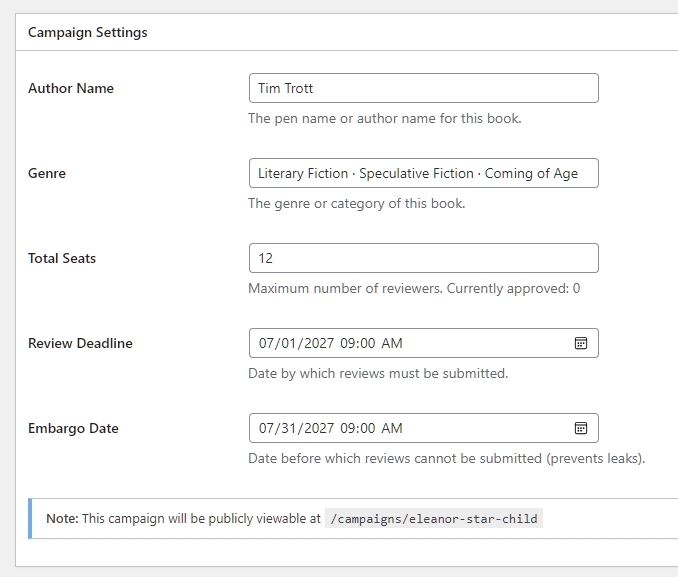
- Inside the ARC Campaign Settings panel, switch to the “Campaign Details” tab.
- Author Name & Genre: Fill these in. They will be displayed beautifully on the public campaign card.
- Total Seats: This is a powerful marketing tool. Set a limit (e.g., 50 or 100 spots). When readers see limited seats, it creates urgency and encourages them to apply faster. Leave it blank for unlimited seats.
- Review Deadline: Click the date picker and select the absolute last day you want readers to finish the book and submit their reviews.
- Embargo Date (Crucial): If your book isn’t published yet, you don’t want reviews leaking early. Set an Embargo Date (usually your launch day). How it works: Readers can download and read the book immediately, but the system will block them from submitting their review links until this exact date has passed.
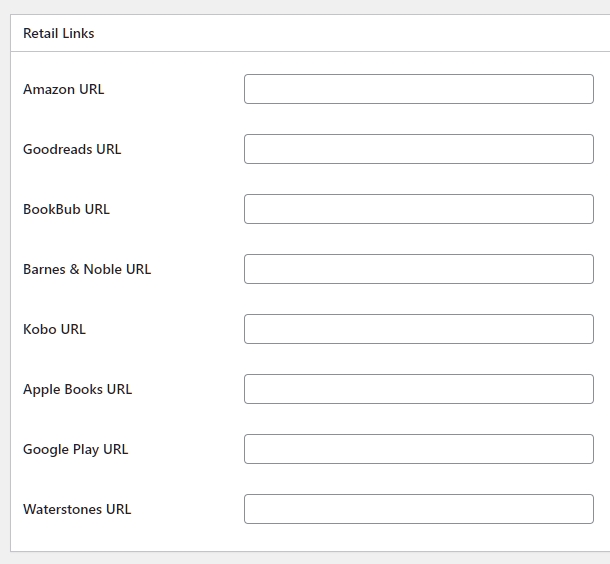
Step 4: Set Up Retail & Review Links
You need to tell your readers exactly where you want them to post their reviews.
How to select platforms:
- Switch to the “Review Links” tab inside the campaign settings.
- You will see a list of checkboxes. The Free version includes the two most important platforms: Amazon and Goodreads.
- If you are using RS ARC Manager Pro, this section unlocks additional premium retail links: BookBub, Barnes & Noble, Kobo, Apple Books, Google Play, and Waterstones.
- Check the boxes for the platforms you require. When a reader tries to submit their review later, the system will force them to provide URLs for the specific platforms you checked here.
Step 5: Publish & Display on Your Website
Your campaign is fully configured. Now, let’s make it live!
- Scroll up to the top right of the screen and click the blue Publish button. Your campaign is now active.
- To display it to your readers: You need a public page where readers can browse your available ARCs.
- Create a new WordPress page (e.g., “Available ARCs” or “Join My Street Team”) via Pages > Add New.
- Add a Shortcode block and paste this exact code:
[rs_arc_campaigns] - Publish that page. Anyone visiting this page will now see a beautiful grid of your active ARC campaigns with an “Apply Now” button!
Phase 3: Managing Your ARC Team & Evaluating Applicants
With your campaign live, applications will start rolling in. As an author, you have complete control over who receives your manuscript. RS ARC Manager provides advanced filtering tools to help you build a reliable and highly engaged team of reviewers.
Step 1: Reviewing Applicants and Reputation Scores
The most important part of running an ARC team is ensuring your books go to readers who will actually leave a review.
How to evaluate your applicants:
- In your WordPress dashboard, navigate to ARC Campaigns > Applicants.
- Here, you will see a comprehensive list of everyone who has applied for your active campaigns.
- Pay close attention to the Reputation Score column. This is RS ARC Manager’s most powerful feature. It automatically tracks a reader’s history, calculating the percentage of books they have downloaded versus the reviews they have successfully submitted.
- Look for the “Super Fan” badge—these are your most reliable reviewers! If you see someone with a consistently poor score, they are likely downloading books without reviewing them.
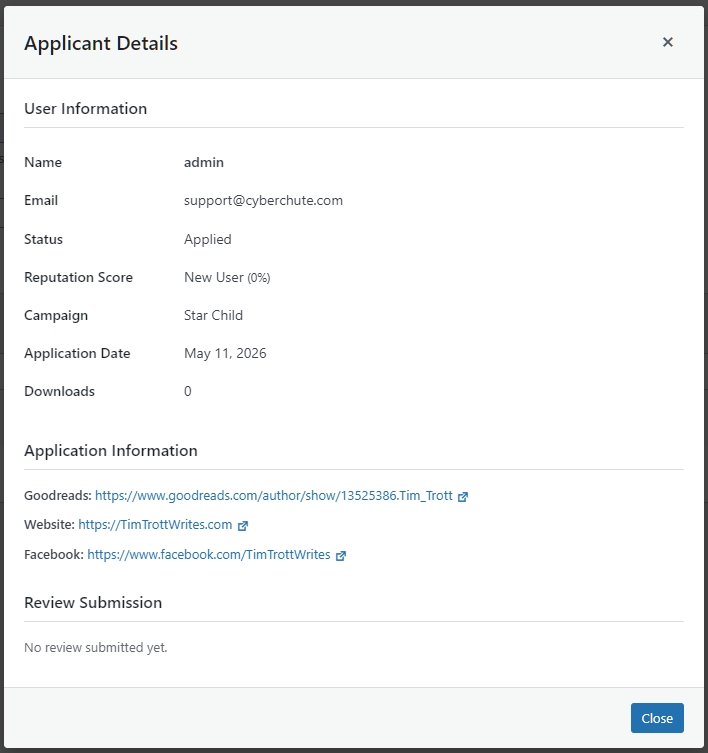
- Click the View Details button next to any applicant to inspect their provided Goodreads URL and other social media profiles (if you gathered them using the Pro version) before making your final decision.

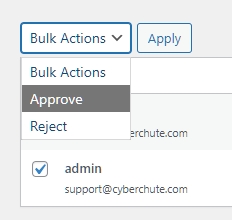
Step 2: Approving or Rejecting Applications
Once you have evaluated an applicant’s profile and Reputation Score, you need to grant or deny them access to your book.
How to manage approvals:
- On the Applicants page, select the checkbox next to the applicant’s name. You can select multiple users at once to process them in bulk.
- Click the Bulk Actions dropdown menu located at the top or bottom of the list.
- Select Approve or Reject, and then click the Apply button.
- When approved, the reader will automatically receive a welcome email, and the secure book files will instantly appear inside their personal Reviewer Dashboard.
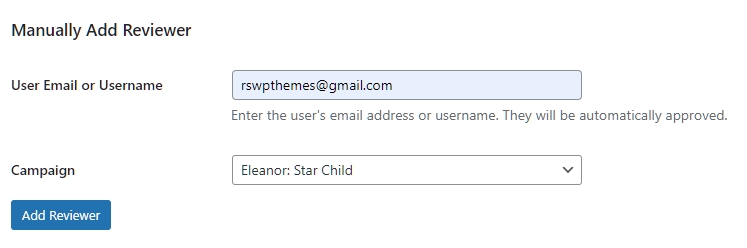
Step 3: Manually Adding VIP Reviewers (Pro Feature)
Sometimes you have close author friends, street team members, or VIP bloggers who shouldn’t have to fill out a public application form to get your book. The Pro version allows you to bypass the queue.
How to add VIPs:
- At the top of the Applicants page, locate the Manually Add Reviewer section.
- Select your specific book campaign from the dropdown menu.
- Enter the VIP’s email address or WordPress username in the text field.
- Click the button to add them. The system will instantly add them to the campaign and automatically mark their status as “Approved”, granting them immediate access to the book.
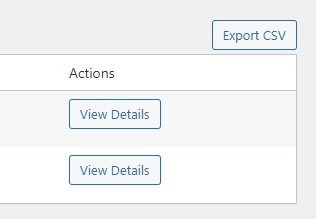
Step 4: Exporting Your ARC List (Pro Feature)
If you need to share your approved reviewer list with a publisher, publicist, or if you want to import their email addresses into your newsletter marketing software (like Mailchimp or MailerLite), you can export the data with a single click.
How to export data:
- On the Applicants page, use the filter dropdown to select your specific campaign.
- Click the Export CSV button located at the top of the page.
- The system will download a complete spreadsheet containing all applicant details for that campaign, including their names, emails, approval status, social media URLs, and eventually, their submitted review links.
Phase 4: Tracking Reviews and Automated Enforcement
The true power of RS ARC Manager shines after your campaign is active and readers finish reading your book. Instead of manually checking Amazon or Goodreads to see if someone left a review, the system tracks everything for you and enforces your deadlines automatically.
Step 1: How Readers Submit Their Reviews
You don’t need to chase readers for links. The Reviewer Dashboard makes it incredibly easy for them to report back to you.
The Reader’s Workflow:
- Once a reader finishes your book and posts their review on the required retail sites, they will log into their Reviewer Dashboard on your website.
- Under your book’s cover, they will click the “Submit Review” button.
- A secure form will pop up asking for their review URLs.
- They must paste their Primary Review Link (usually Amazon). If you selected additional platforms during your campaign setup (like Goodreads, BookBub, or Barnes & Noble), secondary input fields will also appear for them to fill out.
- Once they click submit, their status is instantly updated to “Reviewed.”
Step 2: Monitoring Submissions & Admin Notifications
As an author, you can track this progress in real time without leaving your WordPress dashboard.
How to check review links:
- You don’t have to constantly check the plugin. Every time a reader successfully submits a review, RS ARC Manager will send you an Automated Email Notification containing their name, the book title, and the exact URLs they submitted.
- To view all submissions in one place, navigate to ARC Campaigns > Applicants in your WordPress dashboard.
- Look at the Status column. Users who have finished will be marked with a green “Reviewed” badge.
- Click the View Details button next to a “Reviewed” user to see the exact links they submitted, ensuring they are valid.
Step 3: Deadlines & Automated Enforcement
You set a specific Review Deadline for a reason. Here is exactly how the system enforces that deadline and protects you from “ghost” readers (people who download books and disappear).
How the enforcement system works:
- The Warning (Overdue Status): The moment your official Review Deadline passes, any reader who hasn’t submitted a review link will have their status changed to “Overdue”. They will see a red warning in their dashboard, but they can still submit their review.
- The Grace Period: They now enter the “Grace Period” (which you set in Phase 1, usually 7 days). If you are using the Pro version, the system will automatically send them urgent email reminders during this time.
- The Penalty (Restricted Status): If the Grace Period expires and the reader still has not submitted a review, the system takes action. Their status is permanently changed to “Restricted”.
- Reputation Drop: Once a user is Restricted, their submission form is locked. More importantly, their global Reputation Score drops significantly.
Because of this automated scoring, the next time this user tries to apply for one of your future books, you will immediately see their low score and know to reject them.
Conclusion: Rinse and Repeat!
Congratulations! You have successfully mastered the RS ARC Manager ecosystem. By utilizing this system for every book launch, you will filter out the bad actors, automate your email follow-ups, and build a highly reliable street team that guarantees early reviews and a successful launch day.
Simply go back to Phase 2 whenever you are ready to upload your next masterpiece!


![Remove Accents From Text [ Free Online Tool ]](https://rswpthemes.com/wp-content/uploads/2024/01/Remove-Accents-From-Text-a-Free-Online-Tool-1024x576.jpg)